最近准备入坑Java安全,先从最经典的Struts2漏洞开始吧
1. 测试环境简介
1
2
3
4
| MacOS 10.15
Java 1.8.0_191
IDEA 2019.2.3
Tomcat 9.0.27
|
2. 具体操作步骤
第一步,创建一个Maven项目,如图所示,勾选Create from archetype,并且选择下面的webapp。
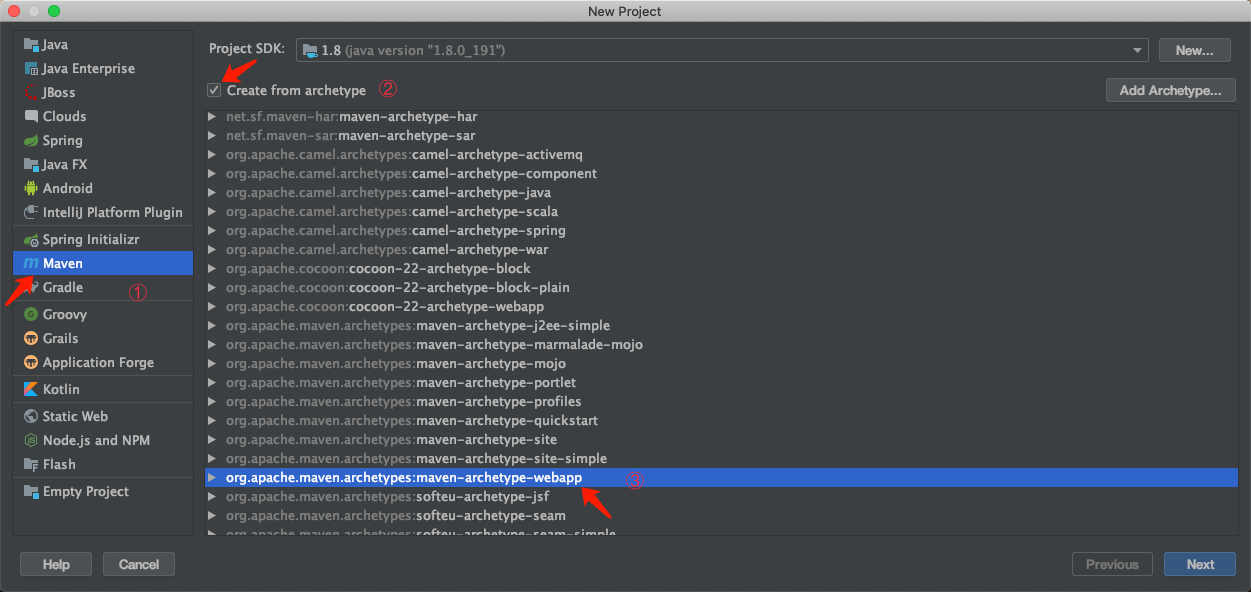
点击Next。
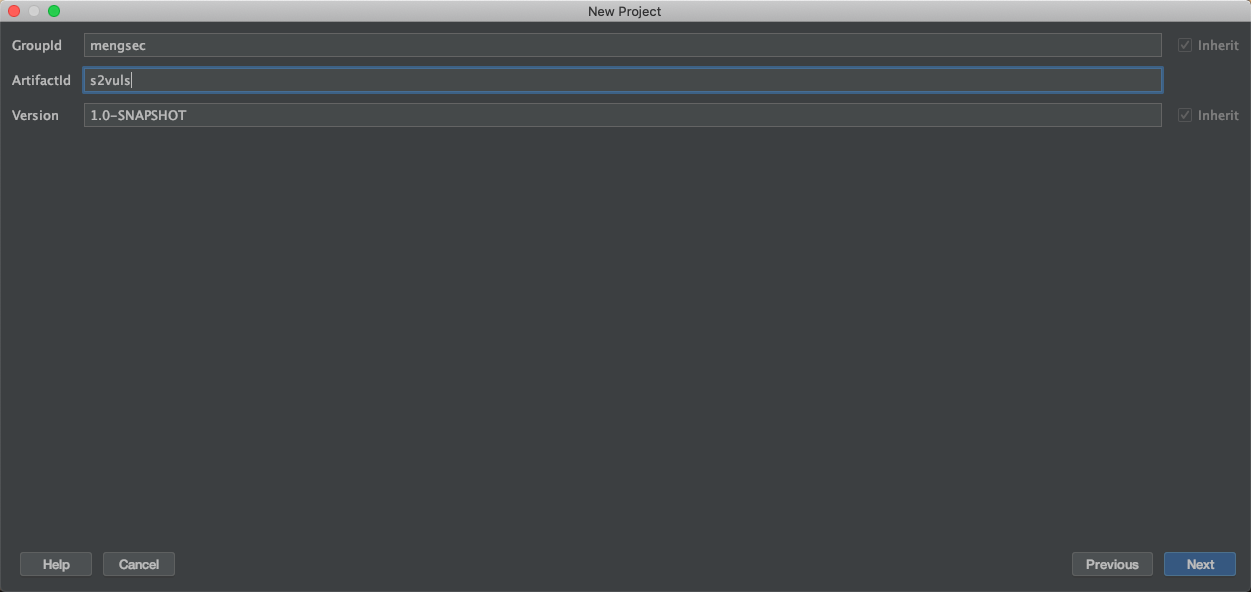
在这里,GroupId和ArtifactId自定义就好,剩下的一路Next。
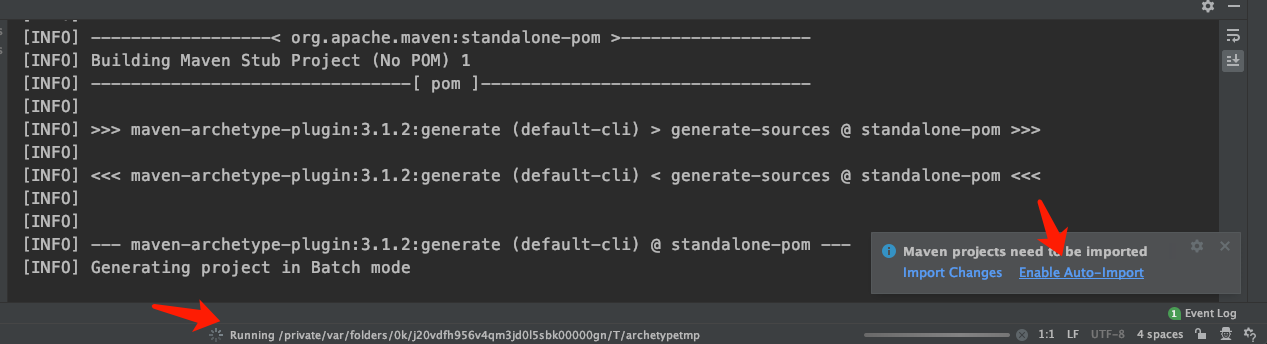
项目创建完毕后,选择右下角的Enable Auto-Import,然后等待Maven构建完毕。
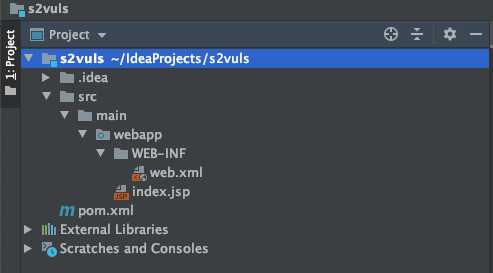
我们刚刚创建完毕的项目如图所示。
接下来我们分别添加并配置Maven的pom.xml,Tomcat的web.xml,Struts2的struts.xml。
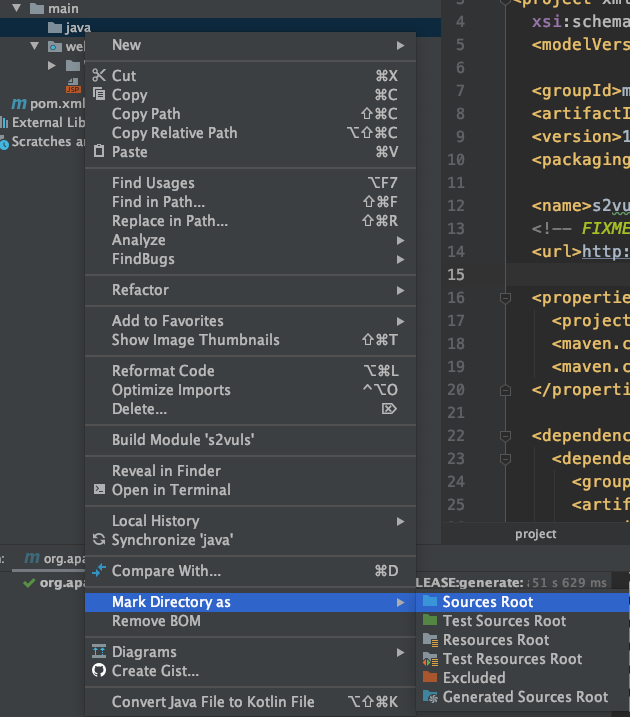
在main目录下创建一个java文件夹,里面放置我们自定义的java类文件,如果IDEA没有将java文件夹标识为资源文件夹的话,可以在文件夹上右键,将其标识为资源文件夹。
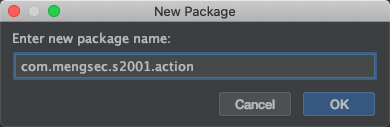
在里面我们创建自定义的Java Package。
然后在其中创建一个名为LoginAction的Java类,内容为
1
2
3
4
5
6
7
8
9
10
11
12
13
14
15
16
17
18
19
20
21
22
23
24
25
26
27
28
29
30
31
32
33
34
35
| package com.mengsec.s2001.action;
import com.opensymphony.xwork2.ActionSupport;
public class LoginAction extends ActionSupport {
private String username = null;
private String password = null;
public String getUsername() {
return this.username;
}
public String getPassword() {
return this.password;
}
public void setUsername(String username) {
this.username = username;
}
public void setPassword(String password) {
this.password = password;
}
public String execute() throws Exception {
if ((this.username.isEmpty()) || (this.password.isEmpty())) {
return "error";
}
if ((this.username.equalsIgnoreCase("admin"))
&& (this.password.equals("admin"))) {
return "success";
}
return "error";
}
}
|
接下来修改pom.xml,添加
1
2
3
4
5
| <dependency>
<groupId>org.apache.struts</groupId>
<artifactId>struts2-core</artifactId>
<version>2.0.8</version>
</dependency>
|
添加这个配置之后,Maven会自动将对应版本的Jar包下载导入,不需要手工配置了,但是这里有个小坑。
IDEA默认不会自动编译发布Java文件夹中的资源文件,可以在pom.xml的build标签中添加以下配置。
1
2
3
4
5
6
7
8
| <resources>
<resource>
<directory>main/java</directory>
<includes>
<include>**/*.xml</include>
</includes>
</resource>
</resources>
|
再修改web.xml,在这里主要是配置struts2的过滤器。
1
2
3
4
5
6
7
8
9
10
11
12
13
14
| <web-app>
<display-name>S2-001 Example</display-name>
<filter>
<filter-name>struts2</filter-name>
<filter-class>org.apache.struts2.dispatcher.FilterDispatcher</filter-class>
</filter>
<filter-mapping>
<filter-name>struts2</filter-name>
<url-pattern>/*</url-pattern>
</filter-mapping>
<welcome-file-list>
<welcome-file>index.jsp</welcome-file>
</welcome-file-list>
</web-app>
|
在webapp目录下创建&修改两个文件——index.jsp&welcome.jsp,内容如下。
index.jsp
1
2
3
4
5
6
7
8
9
10
11
12
13
14
15
16
17
18
19
| <%@ page language="java" contentType="text/html; charset=UTF-8"
pageEncoding="UTF-8"%>
<%@ taglib prefix="s" uri="/struts-tags" %>
<!DOCTYPE html PUBLIC "-//W3C//DTD HTML 4.01 Transitional//EN" "http://www.w3.org/TR/html4/loose.dtd">
<html>
<head>
<meta http-equiv="Content-Type" content="text/html; charset=UTF-8">
<title>S2-001</title>
</head>
<body>
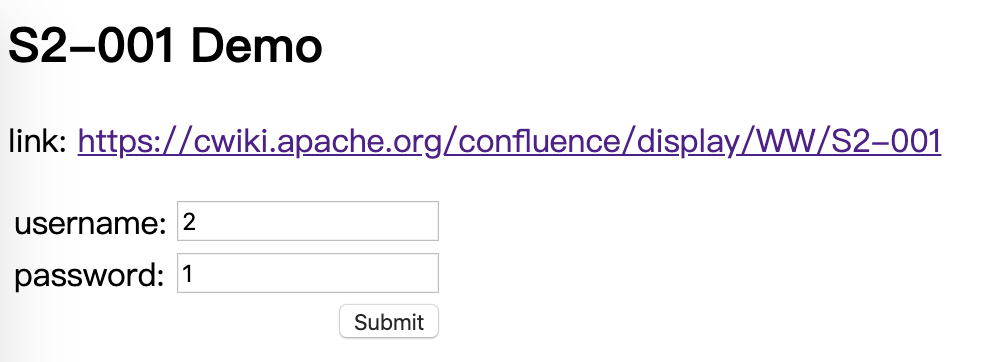
<h2>S2-001 Demo</h2>
<p>link: <a href="https://cwiki.apache.org/confluence/display/WW/S2-001">https:
<s:form action="login">
<s:textfield name="username" label="username" />
<s:textfield name="password" label="password" />
<s:submit></s:submit>
</s:form>
</body>
</html>
|
welcome.jsp
1
2
3
4
5
6
7
8
9
10
11
12
13
14
| <%@ page language="java" contentType="text/html; charset=UTF-8"
pageEncoding="UTF-8"%>
<%@ taglib prefix="s" uri="/struts-tags" %>
<!DOCTYPE html PUBLIC "-//W3C//DTD HTML 4.01 Transitional//EN" "http://www.w3.org/TR/html4/loose.dtd">
<html>
<head>
<meta http-equiv="Content-Type" content="text/html; charset=UTF-8">
<title>S2-001</title>
</head>
<body>
<p>Hello <s:property value="username"></s:property></p>
</body>
</html>
|
然后在main文件夹下创建一个resources文件夹,内部添加一个struts.xml,内容为:
1
2
3
4
5
6
7
8
| <struts>
<package name="S2-001" extends="struts-default">
<action name="login" class="com.mengsec.s2001.action.LoginAction">
<result name="success">welcome.jsp</result>
<result name="error">index.jsp</result>
</action>
</package>
</struts>
|
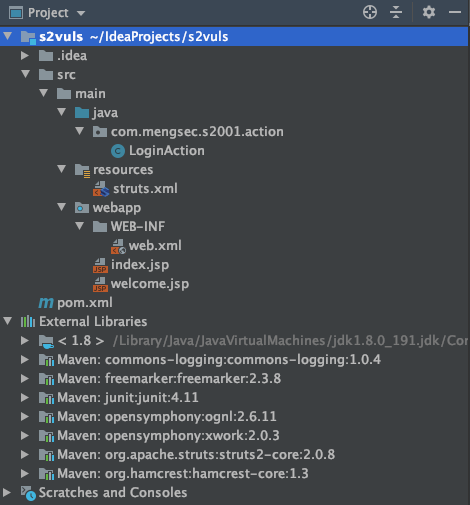
创建完毕的目录如图所示:
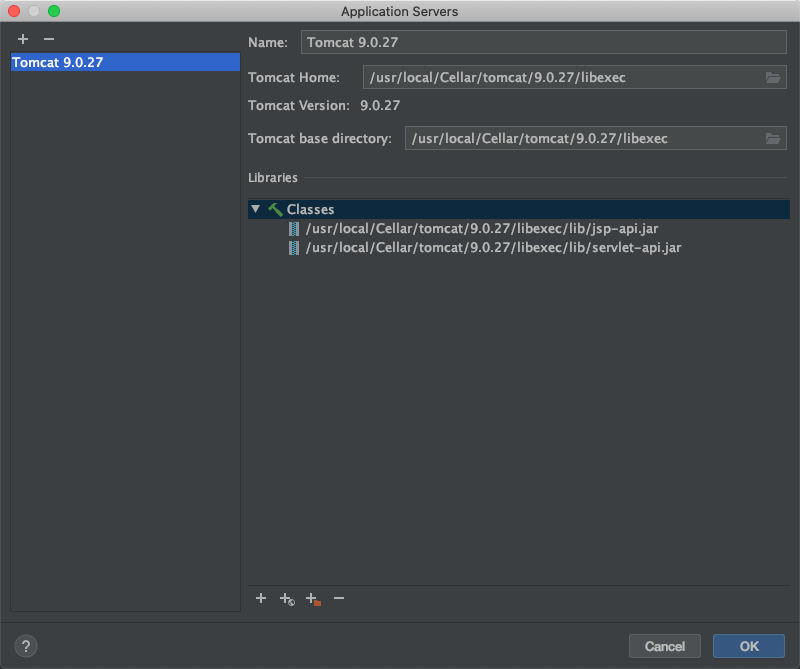
接下来配置Tomcat服务器,在Mac上的话,直接brew install tomcat即可安装tomcat9,安装的路径为/usr/local/Cellar/tomcat/9.0.27。
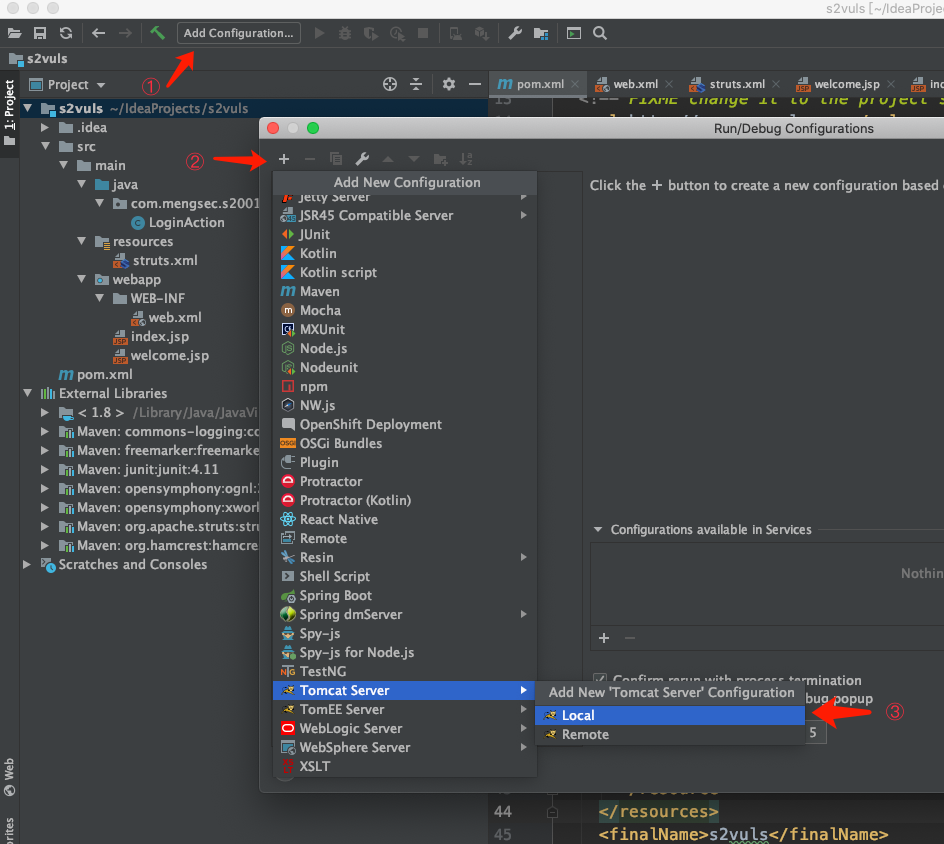
添加一个本地的Tomcat服务器。
配置好Tomcat服务器的路径。
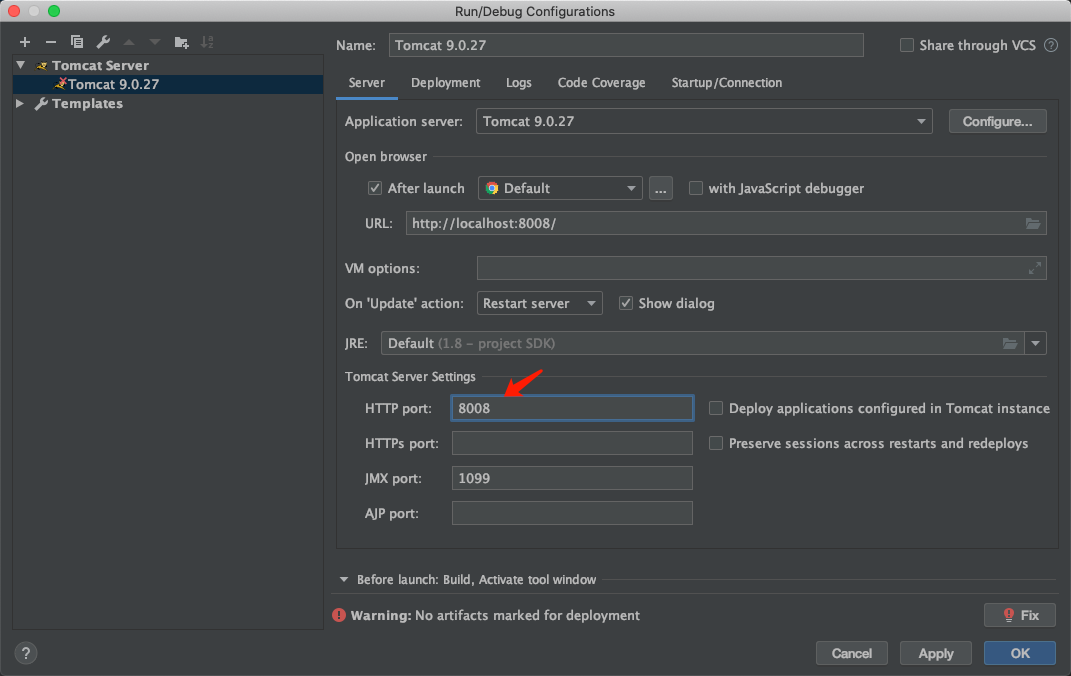
在这里,默认的8080端口与burp的8080端口冲突了,我修改为8008端口了。
然后再点击Deployment,添加一个artifacts。
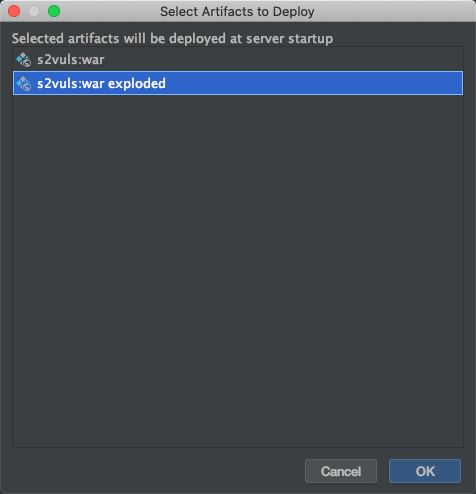
创建完毕后保存配置即可。
然后点击左上角的绿色三角就可以运行了。
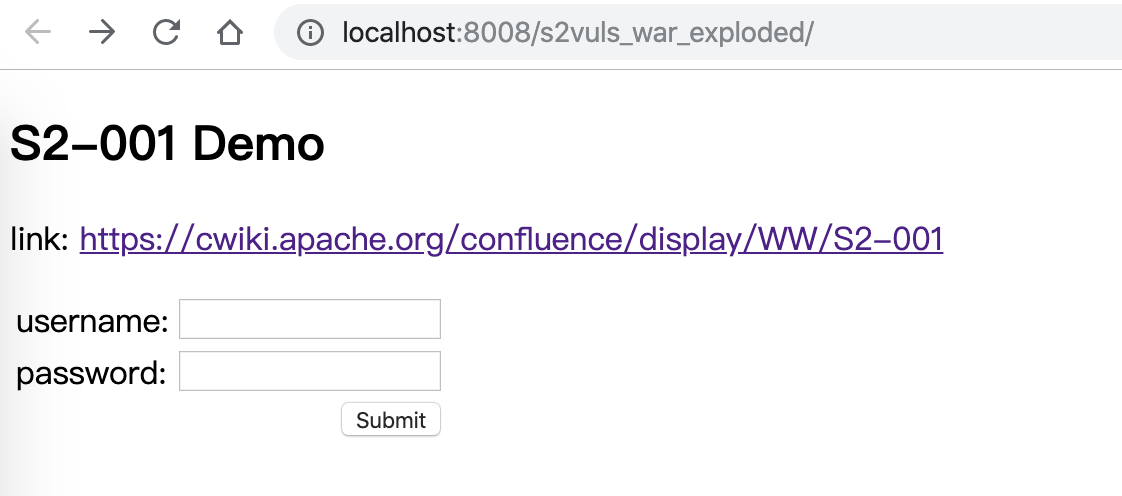
测试一下Payload,在username中输入
至此我们的测试环境就搭建完毕了。